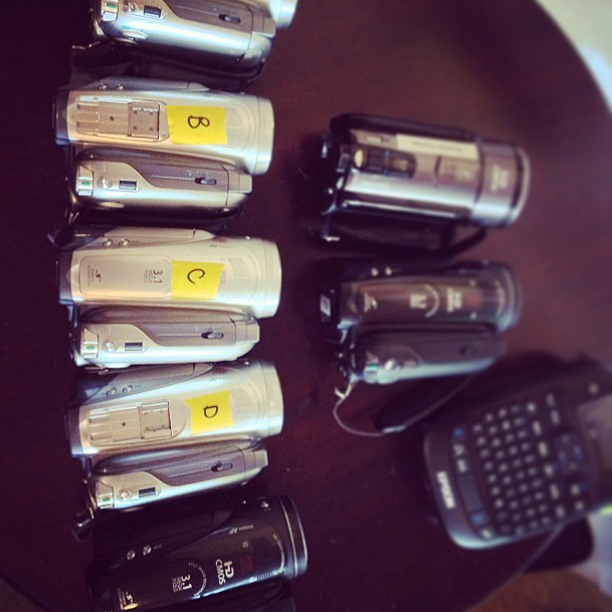
A few weeks ago, I was asked to shoot a project with the idea of looking like it was shot years ago with old public access equipment. The trick was to find a way to shoot with authentic camera gear but still be able to have footage that would digitize easily. Randomly, we were presented with seven Panasonic GS320 MiniDV camcorders (circa 2006) from a friend of the director. This made for a great starting off point.
The cameras were tiny – I had forgotten just how small MiniDV camcorders were! This was our formula:
- Shoot to MiniDV tapes on camera (16:9 / 60i)
- Shoot in full auto mode (shutter / iris / gain / focus)
- Set white balance to camera presets: DAY (sun), INTERIOR (light bulb)
The last pice of the puzzle was to physically shoot like you didn’t know what you were doing (always a funny thing to be asked to do). The director wanted all the camera actions you would see from a “soccer dad” or or a 90’s skate video (unreasonable zooms / whip pans / shaking / out of focus shots…). At the end of the day, I think we embraced the “bad” just right.
The last step was to downgrade the footage (even more). Technically, all the footage was still “Digital” (even in SD) in the timeline, and in order to get some of those fun analogue attributes (bleeding colors / over-under exposure / noise / detail loss…) we had to convert everything. In my opinion, the only way to get that look right is to dump it off to analogue tape and in our case it was VHS.
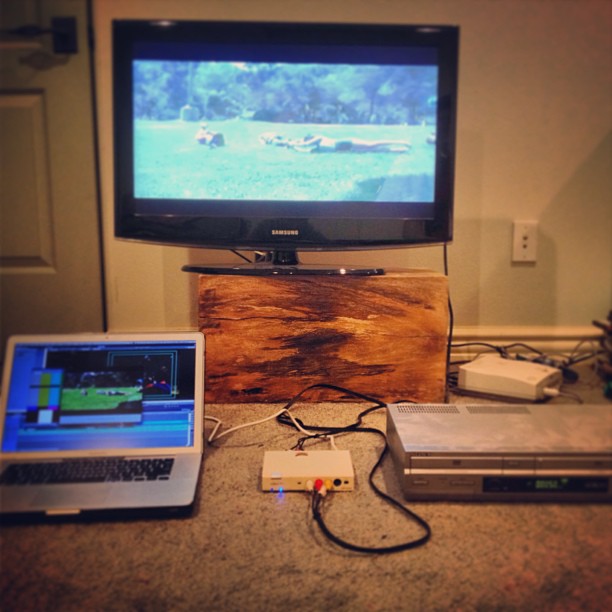
We set it up just like a wedding videographer circa 2003:
- Final Cut Pro (via Print to Tape)
- Firewire 800 out of the MacBook, with an 800 to 400 Firewire cable
- Into a Canopus ADV110 converter (DV)
- Out of Canopus converter via analogue connection (Yellow / Red / White)
- Into a home VCR and onto a VHS tape (SP mode)
Once we laid back to VHS, we simply reversed the pipeline back into the computer, and this is what we got:


